Kong
[Moderator]
7855

PuristS On Tour (P.O.T) 2009 : Day 2 (Morning) to Chopard Geneva
For the Day 1 of P.O.T to L.U.C Fleurier, please click here.
13 October, 2009 , Another great and refreshing morning ...

The lake from my balcony at 7:30am ....

After breakfast, we left to Chopard Geneva (which was covered during my 2008 visit
).

We arrived at about 9:15am ....

A view of another Chopard Building which houses the Watchmaking School to train the apprentices ...


Entering the Chopard Manufacture-Geneva ...

Gathered at the lobby with our host, Mr Patrick Wehrli...
Don's coverage for Day 2 :
chopard.watchprosite.com

First stop to the Design Department which does the creative for both the jewellery and watches ...


The creative process do not start with CAD.... either hand-sketches and some manual mock-up...


Mock up of variations for a model of the L.U.C Regulator ...
After the Design Department, we went to the ground floor ...

Saw an old ad of the Happy Diamonds.... do you know the Happy Diamond was originally designed for gentleman?

Entering to a secure area ...
The Gold smelting room.
Chopard has many decades of expertise in smelting their own gold and creation of alloys to manufacture their own
cases, dials and jewellery.


1 Kilo 999.9 purity GOLD BAR !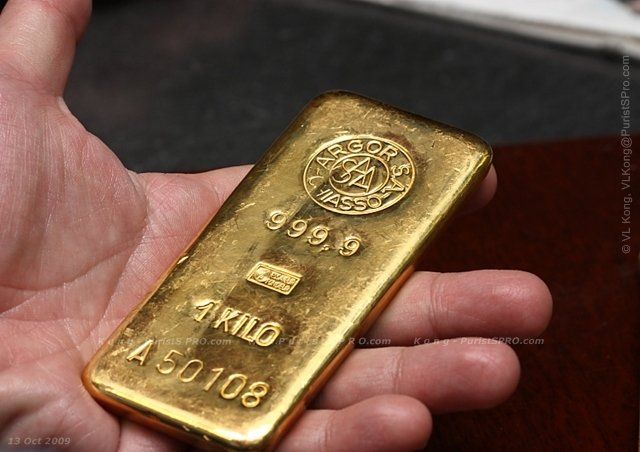
A closer look.
Chopard buys at least 2.5 tons (2,500 pieces of above '1Kilo' bars) per year.

The 999.9 gold bar is smelted and blended with other metals to create various hues of gold like 2N, 3N, Rose 4N and white gold.
The above blended piece is a Rose 4N (marked at the top end of the bar).
The other two components added in different proportion are silver and copper for the yellow and rose gold.
For white gold, palladium is added and later rhodium-plated.
To mix the various components together, they are placed in a high heat crucible to combine them and then poured into
a mold to form into a bigger bar.
The mold removed from the smelting chamber ....

Unlocking the mold ...

Both halves of the mold opened ...

A view of the mixed gold alloy on one-half of the mold ...

Bar removed from the mold...extremely HOT!!!


Gripped with a tool and lowered into water bath to reduce the temperature.

Now you could hold it in your hand.
Hmmm, what were our friends thinking?
The original thicker bar was passed through a machine, a few rounds to progressively roll down to thinner bar of 60 X 6 cm
(as seen on Patrick's hand).

Each bar is labeled and one corner is snipped off and to be send to professional assayers to verify the amount of
precious metal in an alloy and if qualify for the hallmark.

The initial raw materials, the mold and the final gold alloy blanks.
For comparison ... 
Ha! Why chose the long gold alloy blank? 

A pic of a gold L.U.C Quattro with the raw components.
After that we moved over to the annealing department ...

Cases after each stamping process will be passed through the furnace to remove the stress to prevent any micro-cracks.
Next we visited the Stamping Department ...

Tooling to stamp out the cases and also jewellery parts.

To make a particular case, it required 16 steps of progressive stamping.
Note the shape after the FIRST stamping process (see the case marked with #1), the lugs were not shaped, and subsequently
it was shaped by the next few processes, and so on.
After each stamping process, a case will be sent through the furnace for annealing. It is quite a laborious process.


The high tonnage presses which the toolings installed on to stamp the parts.

Semi-completed gold cases from the gold alloy blanks, awaiting for the next stamping step.

Placing the casing into the tool ...

Press down ...

Remove from tooling ...
Check the key dimensions with a micrometer ...
Placed onto tray...and sent for annealing then the next stamping step.

Stainless steel blanks for steel cases ...

Whereas the gold alloy blanks are locked in a cabinet.

Passed by a lathe machine with a diamond cutter which could cut a convex profile around the case or caseback, and
it can cut and level a surface with super-finished condition ...

A closer view, note the cutter and the lubricant being sprayed through out.
An example of before & after going through the diamond tool lathe machine.
The piece on the right is so well-cut & polished at the same time that it is like 'black polish' !
We proceeded to the Machinery floor ....

Passed by the in-house clinic.
Parts like casings, caseback and bracelets could be manufactured with CNC machines too ....

The raw materials - stainless steel solid rods or bars of various sizes stored in crates ...


Bi-metalic, likely for bracelets ...

The stainless steel rod/bar is fed into the multi-axis CNC machine , and the machine will cut out the shape programmed.


Parts were measured at fixed frequency to ensure the dimensions were in specifications....
The balance portion of the rod ...

One of the components by the high-tech machine...
Various CNC milling machines ...
Another machine ...
The metal debris 

Next we moved to the polishing department ...

Polishing a caseback....

Close examination of the surface finish ...
Completed casebacks....

Another station polishing a caseband ...

Polished deployant buckles ...

Next we crossed over to view the bracelets assembly section ...

The machined out components ....

Consisting of links and pins ....

Each link and pin were manually arranged in a jig ....


After that, each link was individually pressed in ...


Flex all the links and ensure the pins were flushed...
Following, we visited the section where cabochons are made ...

The partial faceted rubies...

Rounding off the facets away to create a cabochon ...
The rubies were secured onto a metal rod with a special wax ...

Carefully angled with controlled speed the ruby was polished till rounded...


Constantly stopped, clean and ....
inspect with a loupe and ...

the grinding continue ...
Next we caught a glimpse of the Jewelery division and pictures were discouraged as preparation for next year
150th anniversary pieces were ongoing ...
Soon we moved to the Engraving Department ....

A pic of half section of the department ....
A Master Engraver working under a microscope ....

His tools ...

The hands working on a delicate piece ...

The workpiece was secured with wax to a a wood piece and then onto a rotatable vice.

We interrupted him ....

He is also the master-hands for the hand-engraved Bees caseback on the L.U.C QF.
Two owners were asking for their extra bee
After this we walked upstair .....
A special room which housed the laser-engraving machine ... it is used to mark the part numbers on the casebacks
and also sequential 'limited numbers'.
Saw a prototype of the just launched Lunar Big Date on one of the watchmaker's hand .... requested for a few quick shots.
The production piece and ....
The Prototype ....


Later we crossed over to the L.U.C Assembly Department.
Some of the items display in a huge glass-case ....


The Prototype of Quattro 1.98
The prototype of the genesis L.U.C Cal 1.96 ... for the 1860 Series.


The prize won for the Cal 1.96

The bee-hive emblem ...

The L.U.C insignia
Did not take any pics, as there could be new models which are yet announced ....

And then we met Mr Daniel Bolognesi, one of the brains for new development.
Over here he showed us the video comparison between the typical 4Hz and the under-test 10 Hz.
The sound comparison was recorded and posted here before.
To hear just click the 'play button' below :
PuristS On Tour (P.O.T) 2009 : Day 2 (Morning) to Chopard Geneva
Chopard Museum at Geneva & Meeting with Mr Karl Scheufele
Great to tour the factory in remote yet very impressive !
When you are planning for a trip over to Geneva ...
Dinner at the Cellar

always a treat to read ur post!
Appreciate the kind words ....
Hey Ed, Z3 has answered you with many tempting pics! :-) ....
haha thx for the heads up~

A wonderful photographic tour!
Well said Patrick...
Some more pics...

Reading your posts about the Chopard tour...
We were especially lucky!

Thanks Kong!

A very detailed report. Superb!
Spot on ....almost everything ...

A terrific photo-essay!
Oh! Amerix ...
Kong, Thanks for bringing back the good memory.
Yes time flies ...
I remember that gold-bar!
